

Are you facing troubles while cleaning and maintaining your side by side refrigerator? Do you want to keep it in top-notch condition? Worry no more!
In this article, you will find the best tips and tricks to clean and maintain your side-by-side refrigerator. Make sure you read till the end for a thorough understanding.
Having a good refrigerator can help make life much easier for you and your family. Refrigerators are the backbone of any kitchen and a side-by-side refrigerator is one of the most popular choices for many households. Knowing how to clean and maintain your side by side refrigerator will help ensure it runs smoothly and effectively year after year. This guide will provide you with information on the best ways to keep your fridge in tip-top shape so it can run at its peak performance and efficiency.
We’ll start off with a brief introduction to the parts of a side by side refrigerator, then move on to routine maintenance tasks, cleaning instructions, organizational tips, energy saving measures for ultimate efficiency, troubleshooting guidelines, preventive measures for premature wear & tear, ‘refrigerator no-no’s ” as well as additional useful resources. By following this guide you’ll have all the information needed to properly clean and maintain your appliance so it can be fully functional for years down the road.
Definition of side by side refrigerator
A side by side refrigerator is a style of refrigerator that has two separate compartments that open in the same direction. Both compartments are the same width and equal in height, giving them a clean, symmetrical appearance.
This type of refrigerator is popular for larger households where fresh food needs to be stored at different temperatures than frozen food items, as both door can house different types of items. Additionally, side by side refrigerators provide optimal space for long items such as serving platters and sheet cakes.
Regular maintenance and cleaning are essential for keeping your side by side refrigerator running efficiently and in top condition.

Importance of cleaning and maintaining a side by side refrigerator
Cleaning and maintaining your side by side refrigerator will ensure optimal performance of the appliance and keep it free from dirt, mould and bacteria. Regular cleaning and maintenance is important for improving the efficiency of your side by side refrigerator, reducing energy costs, as well as extending its lifespan. In this complete guide, you’ll learn about the importance of cleaning and maintaining a side by side refrigerator as well as how to do it properly.
It is essential to keep your refrigerator clean in order to avoid contamination that can lead to foodborne illnesses. A well-cleaned component ensures proper cooling throughout the appliance and extends its life expectancy too. Cleaning it regularly helps dissipate heat buildup in the refrigeration compressor that can cause the thermostat to fail or break down completely. It also reduces foul odours while allowing air to flow freely through tiny spaces inside the fridge that are prone to collecting dust or dirt.
Maintaining your side by side fridge also includes keeping an eye on its hoses, seals, shelves, doors and door gaskets for any signs of wear-and-tear or other problems. The seals should be checked for damage on a regular basis so that cold air does not escape due to weakness or gaps in this component. The shelves should also be thoroughly cleaned with a mild detergent solution once every two months in order remove grime from hard-to-reach areas like corners of drawers and walls within the fridge; this is especially important if you have small children who tend not put food back into containers before placing them inside! Additionally, make sure you check shelves for any broken pieces which could lead contaminated food spilling onto other items stored within the fridge’s interior – consider replacing these when necessary.
The door mechanisms should be inspected too; if there are signs of wear or visible scratches on hinges or direct contact with any objects they should be fixed immediately as they may interfere with proper functioning of your appliance. Finally, make sure that all Gaskets have been reattached securely – while loose gaskets will not directly affect performance they could allow dust particles into small crevices which create bacteria colonies feeding off warm air leaking out from underneath them over time; this may result in bad odours circulating through your kitchen which nobody wants!
Basic Maintenance
To keep your side by side refrigerator running smoothly, it’s important to follow a few basic maintenance steps. Proper maintenance will help extend the life of your refrigerator and reduce the need for expensive repairs down the road. Here is a step-by-step guide for basic refrigerator maintenance:
- Check for air flow- Make sure there is adequate air flow around the sides of your refrigerator to allow heat to dissipate. If the heat can’t escape, it will build up in the system and cause cooling problems or other malfunctions.
- Clean vents and coils- Vacuum or dust off all vents and cooling coils periodically to ensure optimal circulation of air. This will also help with efficient cooling as well as electricity costs.
- Look for signs of wear or damage- Inspect all hoses, fittings, insulation, pumps and fans regularly to see if there are any areas that need repair or replacement due to wear or damage from age or use.
- Check temperatures regularly- Open both sections (freezer and fridge) and check temperatures with an accurate thermometer periodically throughout the year; you want both sections within 3-4 degrees F of their ideal temperature range (37 F for freezer, 40 F for fridge). Use these results for comparison against future tests as an early indicator when something may be wrong with your refrigeration system so you can take action promptly before major damage occurs.
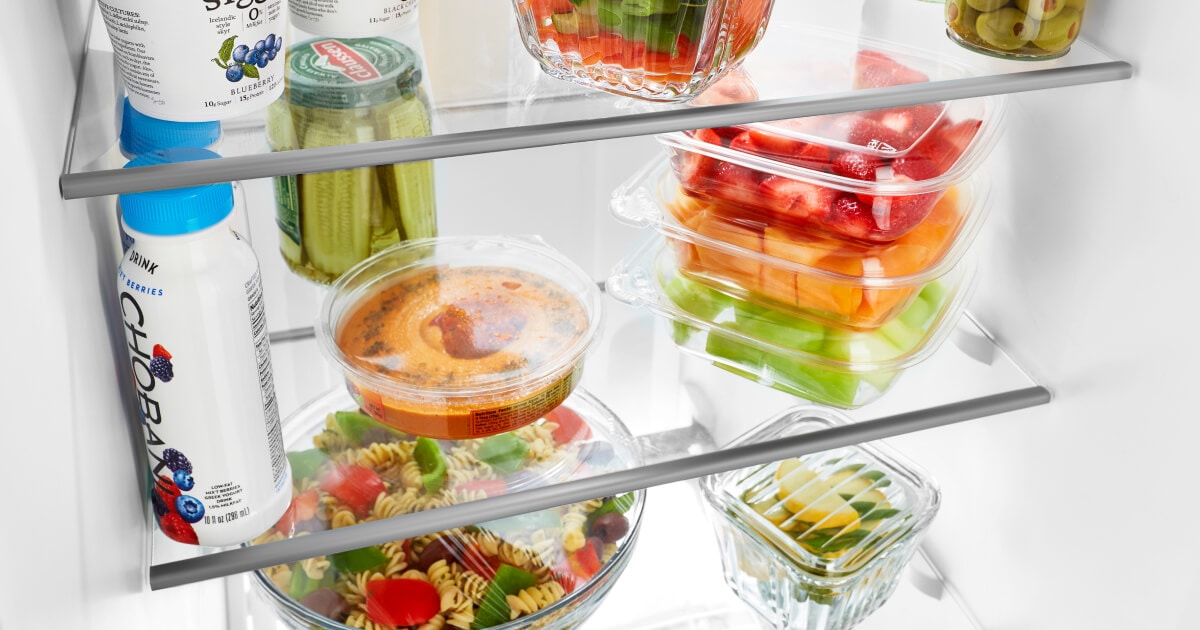
Removing and cleaning shelves and drawers
Removing shelves and drawers from your side-by-side refrigerator is a relatively straightforward process that typically only requires you to lift the shelf or drawer up and out of its housing. However, different models will vary slightly, so it’s important to take note of each step as you move through the process.
Before cleaning any parts of your refrigerator, make sure the power is turned off and any perishable food items are removed from these spaces. Once you’re sure everything has been cleared out, carefully lift shelving units up in order to free them from pins on the side walls and pull them towards you. This motion should be gentle in order to avoid breaking parts or damaging any surfaces by pushing too hard or moving too quickly.
Drawers may be slightly harder to remove as they are often hooked on at least one side with a pin and tab setup. You may need to press down firmly on the drawer while lifting it upward in order to give it enough leverage so that it can pull away from its pin attachments on either side. Once completely removed, racks and shelves can be cleaned with soap and water, while drawers should be done using warm water with a mild detergent or specialized cleaner made for use with plastics. It’s also important not to forget about protective elements such as glides that help shelving slide more smoothly when expanded for use; these should also be included in your regular cleaning routine for optimal performance levels of your refrigerator’s materials over time.
Vacuuming the condenser coils
Vacuuming the condenser coils of your side by side refrigerator is essential for proper maintenance. This will ensure that the heat from inside the refrigerator is properly dissipated, which aids in performance and energy efficiency. Condenser coils are located on the underside of the unit, near the back wall, and should be vacuumed every three months or so.
Begin by unplugging your refrigerator from power and pulling it away from the wall if necessary. Vacuum any dust or debris that has gathered in the area around and behind your appliance before moving to the coils, then use a soft-bristle brush attachment to sweep any dust or grime off of them. You may need to lift up one edge of your refrigerator to fully access all of its condenser coils; depending on your model this could involve removing both plastic grilles. Refer to your owner’s manual for specific directions before attempting this step, as you do not want to damage any of its components while cleaning them.

Checking the door gasket for leaks and wear
When checking the door gasket for leaks and wear, it is important to look for cracks or gaps along the gasket. It’s also a good idea to open and close the door several times while looking for any signs of abnormal pressure around the seal. If necessary, lubricate any hinges that are showing signs of wear.
Additionally, clean around the edges of the rubber seal with a mild detergent and warm water. This will help ensure that food particles and/or other debris does not build up in between the rubber seal and inner wall of your refrigerator.
Finally, paying attention to how well your refrigerator seals when closed can help you identify any potential problems with your door gasket before they become an issue.
Advanced Maintenance
Advanced maintenance involves more frequent cleaning, checking and replacing of your unit’s components. This includes the following:
Water filter: Check manufacturer’s recommendations for changing out your water filter. Some refrigerators may operate with a filtered water system that requires periodic filter changes, so be sure to check the installation instructions for your particular model. Replace the old filter after installing a new one and flush out any air bubbles by running several gallons of water from the dispenser into a container.
Condenser coil: The condenser coils should be cleaned regularly (at least every 6 months). Unplug the refrigerator before cleaning and use an approved coil-cleaning brush or vacuum brush attachment to remove any dust or debris build up on the coils. After brushing, use a garden hose with low pressure to rinse off remaining debris. Allow time for drying before powering back up.
Air flow ventilation: Inspect and clean air flow grills at least twice a year using a vacuum hose attachment. Clean all dirt and lint accumulation from around fan blades as well.
Thermostat probe and fan blades: Remove any dust build up on this component with an approved brush before replacing it in its original position and affixing it securely back in place with screws or clamping hardware if necessary.
Replacing the water filter
Replacing the water filter in your side by side refrigerator is an important part of keeping it in good working order. A clogged or otherwise faulty water filter can lead to unpleasant odors, poor tasting water and even a breakdown of the machine. It’s recommended that the filter be replaced at least every six months, or more often if it’s used heavily.
Here is how to replace the filter in your side by side refrigerator:
- Locate the filter – Many models have a dedicated compartment specifically for the water filter; if yours doesn’t, check inside and behind where the icemaker would be located (if your model has an icemaker).
- Unscrew and remove old filter – The protective screw should be easy to locate and remove.
- Insert new filter – Place the new filter in place according to instructions and tighten into place using a screwdriver or other tool as necessary.
- Flush new filter with water – Before use, run several gallons of cold tap water through the system until it runs clear (no more than 7 minutes). This will enable you to ensure that any air or impurities from packaging has been cleared from your system before use.
- Reset indicator on control board – If applicable, rest any indicator that lets you know when it is time to change your filters from red/green to green/white (or any other color code).
6 Test system – To ensure that everything is running properly, press an ice cube dispenser button for 5 seconds until you hear a ‘click’. Wait 2-3 hours for ice production cycle complete; tasteless/odorless ice cubes indicates proper operation.
Defrosting the freezer
Proper defrosting of the freezer is an important part of keeping a side by side refrigerator in good condition. Regularly clearing ice buildup in the freezer will help it run more efficiently and with less noise.
The process for manual defrosting depends on the type of temperature control system used in your refrigerator.
For those models with mechanical temperature control, you will need to turn off the main power switch, then remove food from the unit and unplug it from the wall outlet. Allow the unit to thaw out naturally over time, then thoroughly clean and dry before re-using. Make sure to check seals on gasket door surfaces during this time.
Models that have an electronic temperature control system require a different method of manual defrosting. First, unplug your unit from its power source and set all temperatures to OFF using the provided controls. Place metal pans filled with water inside your freezer to absorb some heat from interior walls and begin melting ice buildup within a few hours (a hair dryer can also be used for this purpose). Heated metal should not be used for this task as it can easily damage plastic components within your fridge’s interior cavity or cause injury when accidentally touched without realizing how hot it has become reached due to contact with metal panels or walls of your appliance.
After around 15 minutes (or however long recommended by appliance manufacturers) remove pans or use caution when touching heated items safely dispose them away from others’ reach once done; repair parts may be needed if they have damaged wiring while inside appliance settings during cleaning process.
It is important to wipe down every surface that was left wet during melt down stage before returning plugging back into wall socket; otherwise condensation can create permanent damage if allowed time before use continues again unchecked correctly earlier on in upkeep maintenance practice needed carry out now periodically advised maximize longevity lifespan owned fridge freezer home kitchen!
Conclusion
Regular and thorough maintenance of your refrigerator is essential in order to maximize its performance and extend its life. Depending on your internal setup, this could mean as little as weekly cleaning and checking of the temperature, power consumption or other metrics.
Both manual cleaning and using a vacuum cleaner to clear away dust, debris and mold will help keep your machine running smoothly. Additionally, changing the water filter periodically ensures that you have clean water for drinking at all times.
Regular servicing can also be worth considering if you need technical assistance or are looking for adherence to manufacturer guidelines for lubrication and other requirements. Spending time on maintenance now can benefit you in the long run by fixing problems before they become serious enough to require a costly repair or replacement of your fridge.
FAQ’s
How do you clean a side-by-side refrigerator?
To clean a side-by-side refrigerator, start by removing all the food and shelving units. Wipe down the shelves, interior walls, and door with a solution of warm water and mild detergent. Rinse with a damp cloth and dry with a clean towel. Next, clean the exterior with a mixture of warm water and vinegar or a stainless steel cleaner. Finally, replace the shelves and food items.
How do you clean a side by side freezer?
To clean a side-by-side freezer, start by unplugging the unit and removing all food items. Allow any ice buildup to thaw completely. Wipe down the interior with a solution of warm water and mild detergent. Rinse with a damp cloth and dry with a clean towel. Clean the exterior with a mixture of warm water and vinegar or a stainless steel cleaner. Finally, plug in the unit and replace the food items.
What are the disadvantages of a side-by-side refrigerator?
The disadvantages of a side-by-side refrigerator include a narrower interior space that may limit the size of food items that can be stored, less freezer space, and a higher energy consumption than other types of refrigerators.
What is the best way to clean a side by side?
The best way to clean a side-by-side refrigerator is to remove all food and shelving units, wipe down the interior with a solution of warm water and mild detergent, and clean the exterior with a mixture of warm water and vinegar or a stainless steel cleaner.
What’s the best thing to clean inside of fridge?
The best thing to clean the inside of a fridge is a solution of warm water and mild detergent. Avoid using harsh chemicals that may damage the interior surfaces or leave behind a strong odor.
What are the 8 steps in cleaning the refrigerator?
The 8 steps in cleaning the refrigerator are as follows:
- Empty the contents of the fridge
- Remove the shelves and drawers
- Wash the shelves and drawers with warm, soapy water
- Wipe down the interior walls and door with warm, soapy water
- Rinse all surfaces with a damp cloth
- Dry all surfaces with a clean towel
- Replace the shelves and drawers
- Return the contents to the fridge
How do you clean a refrigerator step by step?
To clean a refrigerator step by step, follow these instructions:
- Empty the contents of the fridge
- Remove the shelves and drawers
- Wash the shelves and drawers with warm, soapy water
- Wipe down the interior walls and door with warm, soapy water
- Rinse all surfaces with a damp cloth
- Dry all surfaces with a clean towel
- Clean the exterior of the fridge with warm water and vinegar or a stainless steel cleaner
- Replace the shelves and drawers
- Return the contents to the fridge
How do I keep my fridge clean and fresh?
To keep your fridge clean and fresh, regularly wipe down spills and messes as they occur. Dispose of expired or spoiled food items promptly, and store food in airtight containers. Keep an open box of baking soda in the fridge to absorb odors, and clean the fridge thoroughly every few months.
How often should you clean your fridge?
It is recommended to clean your fridge thoroughly every three to four months. However, you should wipe down spills and messes as they occur to keep the fridge clean and fresh.
How do you clean a refrigerator naturally?
To clean a refrigerator naturally, mix equal parts water and white vinegar in a spray bottle. Spray the solution on the interior walls and shelves, and wipe clean with a damp cloth. For tough
See Also:
- Best Stainless Steel Side By Side Refrigerator
- Best Side By Side Refrigerator For Garage
- Best Side By Side Refrigerator Under $2000
- Best 48 Inch Refrigerator SideBySide
- Best Counter Depth Side By Side Refrigerator